


 +86-15993995054
+86-15993995054
+86-15993995054


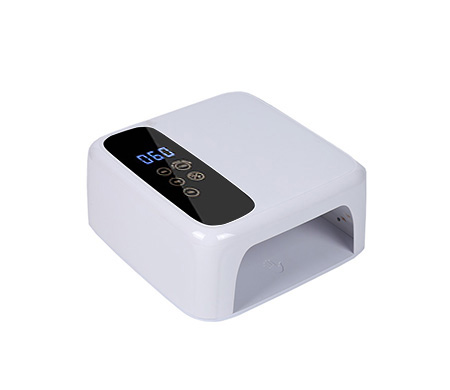
For beginners stepping into the exciting world of nail art and DIY manicures, a nail lamp is an essential tool. It simplifies the process of curing gel nail polishes, ensuring a long - lasting, professional - looking finish. However, with a plethora of options available in the market, choosing the right nail lamp can be a daunting task. This guide will walk beginners through everything they need to know about nail lamps, from understanding how they work to selecting the perfect one for their needs and using it safely and effectively.
How Nail Lamps Work
UV Nail Lamps
UV (Ultraviolet) nail lamps are one of the most common types. They emit ultraviolet light, mainly in the UVA wavelength range (320 - 400 nanometers). Gel nail polishes are formulated with photo - initiators. When exposed to the UV light from the lamp, these photo - initiators absorb the energy and break down into free radicals. These free radicals then react with the monomers in the gel polish, causing a polymerization process. The monomers link together to form long polymer chains, transforming the liquid gel polish into a hard, durable coating on the nails. UV lamps typically have a broader spectrum of light emission compared to some other types, which can be both an advantage and a drawback. The advantage is that they can cure a wide variety of gel products. However, the broader spectrum may also mean a longer curing time in some cases, as not all of the emitted light is precisely tuned to the optimal wavelength for the gel's photo - initiators.
LED Nail Lamps
LED (Light - Emitting Diode) nail lamps have gained significant popularity in recent years. They are more energy - efficient compared to UV lamps. LED lamps emit light at specific, narrow wavelengths, usually around 365 nm or 405 nm, which are the optimal wavelengths for curing most gel nail products. The focused wavelength emission allows for a more targeted and efficient curing process. This often results in shorter curing times. For example, a standard layer of gel polish may require only 30 - 60 seconds of exposure to an LED lamp, while the same layer could take 1 - 2 minutes in a UV lamp. The energy - efficiency of LED lamps also means they produce less heat during operation, reducing the risk of discomfort or burns to the user.
Dual - Cure Nail Lamps
Dual - cure nail lamps are designed to combine the functionality of both UV and LED light sources. They offer the flexibility to cure a wider range of gel products, including those that are specifically formulated to be cured by either UV or LED light. This type of lamp is particularly useful for beginners who may experiment with different brands and types of gel polishes. Dual - cure lamps can be a bit more expensive than single - source lamps, but they provide versatility, making them a good investment if you plan to explore various nail products in the future.
Key Considerations When Choosing a Nail Lamp for Beginners
Type of Gel Polish Compatibility
As a beginner, it's important to choose a nail lamp that is compatible with the gel polishes you intend to use. Some gel polishes are specifically formulated for UV lamps, while others work best with LED lamps. If you're not sure which type of gel polish you'll be using, a dual - cure lamp can be a safe bet. However, if you plan to stick with a particular brand or type of gel polish, check the product specifications to ensure it is compatible with the lamp you're considering. For example, some budget - friendly gel polishes on the market are designed for LED lamps due to their popularity and shorter curing times, so if you're on a tight budget and plan to use these products, an LED lamp would be a suitable choice.
Curing Time
Curing time is a crucial factor, especially for beginners who may be impatient or have limited time for their nail - care routine. LED lamps generally offer faster curing times, which can be a great advantage. However, it's also important to note that different gel polishes, even when used with the same lamp, may require different curing times depending on factors such as the thickness of the layer applied, the color of the polish (darker colors may sometimes take longer to cure), and the brand's specific formulation. Look for a lamp that has a timer function, preferably with adjustable settings. This allows you to set the appropriate curing time for different gel products. Some lamps come with pre - set timer options for common gel polish types, which can be very convenient for beginners.
Size and Portability
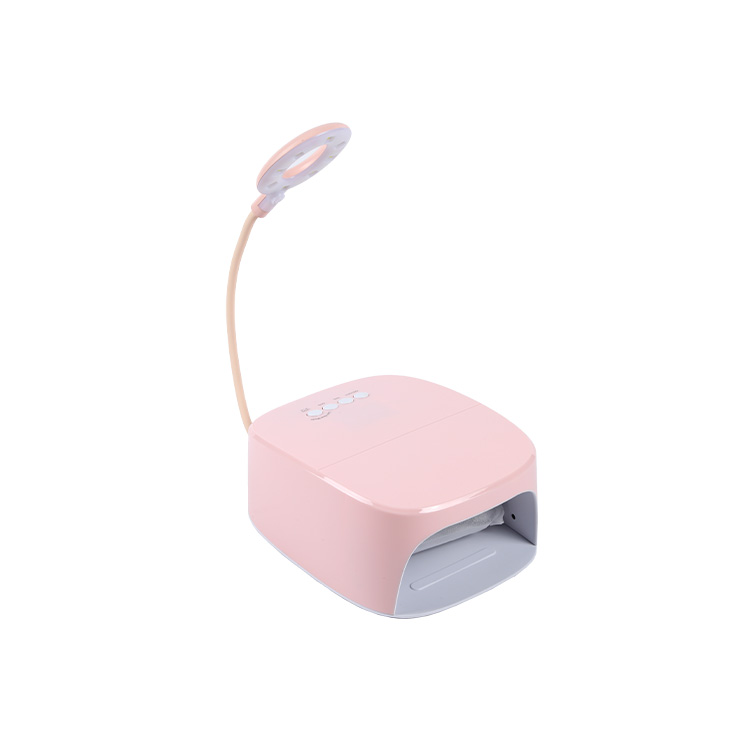
If you plan to do your nails at home and don't anticipate moving the lamp around much, a larger table - top lamp may be suitable. These lamps often have a larger interior space, making it easier to fit both hands or feet inside for a full manicure or pedicure. They also tend to have more powerful light sources, ensuring even curing across all nails. On the other hand, if you're on the go or have limited space, a portable, compact nail lamp is a better option. Portable lamps are usually smaller, lightweight, and may be battery - powered, allowing you to use them anywhere. Some portable lamps are even designed to be used with mobile devices, with features like USB charging ports. This portability is great for those who want to touch up their nails while traveling or during their lunch break at work.
Safety Features
Safety should not be overlooked when choosing a nail lamp. Prolonged exposure to UV light, even at the relatively low - intensity levels emitted by nail lamps, can increase the risk of skin damage and premature aging. Look for lamps that have built - in safety features. Some lamps have shields or barriers to minimize the amount of UV light that escapes, protecting the skin around the nails. LED lamps are generally considered safer in terms of UV exposure as they emit little to no UV light outside of the optimal curing wavelengths. Additionally, lamps with automatic shut - off features are a good choice. This ensures that the lamp turns off if it overheats or if it has been running for an extended period, reducing the risk of accidents.
Price
Nail lamps come in a wide price range, from budget - friendly options to high - end, professional - grade models. As a beginner, you don't necessarily need to invest in the most expensive lamp on the market. There are many affordable options available that can still provide excellent results. Budget lamps can cost as little as $10 - $30, while more advanced, professional - grade lamps can range from $100 - $300 or more. Consider your budget and how often you plan to use the lamp. If you're just starting out and not sure if nail art will become a regular hobby, a budget - friendly lamp may be sufficient. However, if you're serious about developing your nail - art skills and plan to use the lamp frequently, investing in a mid - range or higher - quality lamp may be a more cost - effective choice in the long run, as it may offer better performance and durability.
Using a Nail Lamp: Step - by - Step Guide for Beginners
Preparation
Before using the nail lamp, start by preparing your nails. Trim and shape your nails to your desired length and shape. File the surface of the nails gently to create a slightly rough texture. This helps the gel polish adhere better. However, be careful not to over - file, as this can damage the nails. Next, push back your cuticles using a cuticle pusher. Clean your nails thoroughly with a nail polish remover to remove any oils or residue.
Applying the Base Coat
Apply a thin layer of base coat gel polish to your nails. Make sure to cover the entire nail surface evenly, including the edges. Place your nails inside the nail lamp and set the timer according to the instructions on the base - coat product. For an LED lamp, this may be around 30 - 60 seconds, while for a UV lamp, it could be 1 - 2 minutes. Once the timer goes off, remove your nails from the lamp. The base coat should now be hardened.
Applying the Color Coat
Apply the color gel polish in thin layers. It's better to apply two or three thin layers rather than one thick layer. After each layer, place your nails back in the nail lamp and cure for the recommended time. The curing time for the color coat may be similar to that of the base coat, but it can vary depending on the brand and type of gel polish. Allow each layer to dry completely before applying the next one. This ensures a smooth and even finish.
Applying the Top Coat
Once you're satisfied with the color, apply a thin layer of top - coat gel polish. The top coat adds shine and durability to your manicure. Place your nails in the lamp one last time to cure the top coat. Again, follow the recommended curing time for the top - coat product. After curing, your nails should have a beautiful, long - lasting gel manicure.
Maintenance and Care of Your Nail Lamp
Cleaning
Regularly clean your nail lamp to ensure optimal performance. Use a soft, dry cloth to wipe the interior and exterior of the lamp. If there is any residue from gel polish on the lamp, be careful not to use harsh chemicals that could damage the lamp. Instead, use a gentle nail polish remover on a cloth to carefully remove the residue. Make sure the lamp is unplugged (if it's not battery - powered) before cleaning.
Storage
When not in use, store your nail lamp in a cool, dry place. Avoid exposing it to extreme temperatures or humidity, as this can affect the performance of the lamp and the lifespan of its components. If your lamp has a lid, keep it closed when storing to prevent dust from getting inside.
Checking for Malfunctions
Periodically check your nail lamp for any signs of malfunction. Look for issues such as uneven light emission, overheating, or a timer that is not working correctly. If you notice any problems, refer to the manufacturer's instructions for troubleshooting or contact their customer support. Continuing to use a malfunctioning lamp can not only result in poor - quality manicures but also pose a safety risk.
Conclusion
A nail lamp is a valuable tool for beginners in the world of nail art. By understanding how different types of nail lamps work, considering key factors when choosing one, and following the proper steps for using and maintaining it, you can achieve beautiful, long - lasting gel manicures at home. With the right nail lamp and a bit of practice, you'll be on your way to creating stunning nail art designs and enjoying the satisfaction of a professional - looking manicure that you've done yourself. Whether you're a casual nail - care enthusiast or someone looking to develop more advanced nail - art skills, the right nail lamp is an investment that will enhance your DIY nail - care experience.

 +86-15993995054
Address: No. 2 Factory Workshop, Fukang Road, Pinghu Community, Pinghu Street, Longgang District, Shenzhen
Tel: +86-15993995054
E-mail: info@taishida.com


 Home >